


It’s 2023…I’ve been married for 9 years and have two beautiful daughters who are 6 years old. I’m in my 16th year of teaching Industrial Arts at the middle school level and have completed dozens of projects on our house - both inside and outside our little slice of suburban country heaven. I have given renewed life to some pretty cool vehicles (we’ll save those stories for another day) and have fixed a lot of things from snow blowers to tractors, dune buggies to dirt bikes, and everything my kids break! Life was busy, and it was only going to get busier…so after school let out in June, I decided it was time to make my dream a reality and build my very own hot rod. I didn’t want to wait until I was in mid-life-crisis mode (or spending every weekend at a sporting event.) Of course I discussed this with my wife, Kim, who has always been very supportive of my “garage projects” and I got the green light.
I knew the style of car I was looking for - a “rat rod T-Bucket” kind of thing. I wasn’t convinced I would have the time to do a full custom build, so I was looking for something that had been started but never finished; or an older car that needed some TLC to work and run, but wasn’t so nice that I would feel bad cutting it up to make it my own. I set a budget and started searching. Initially I had trouble finding what I wanted in my price range, until one day while scrolling through Facebook Marketplace I came across an ad for a Crosley hot rod. I’d never heard of Crosley, but the car appeared to be some sort of T-Bucket. My first impression was that it looked kind of weird…there was just something off about it. While that would probably be a turnoff for most, I have always found quirky or odd vehicles interesting, so I clicked on the ad to see more.
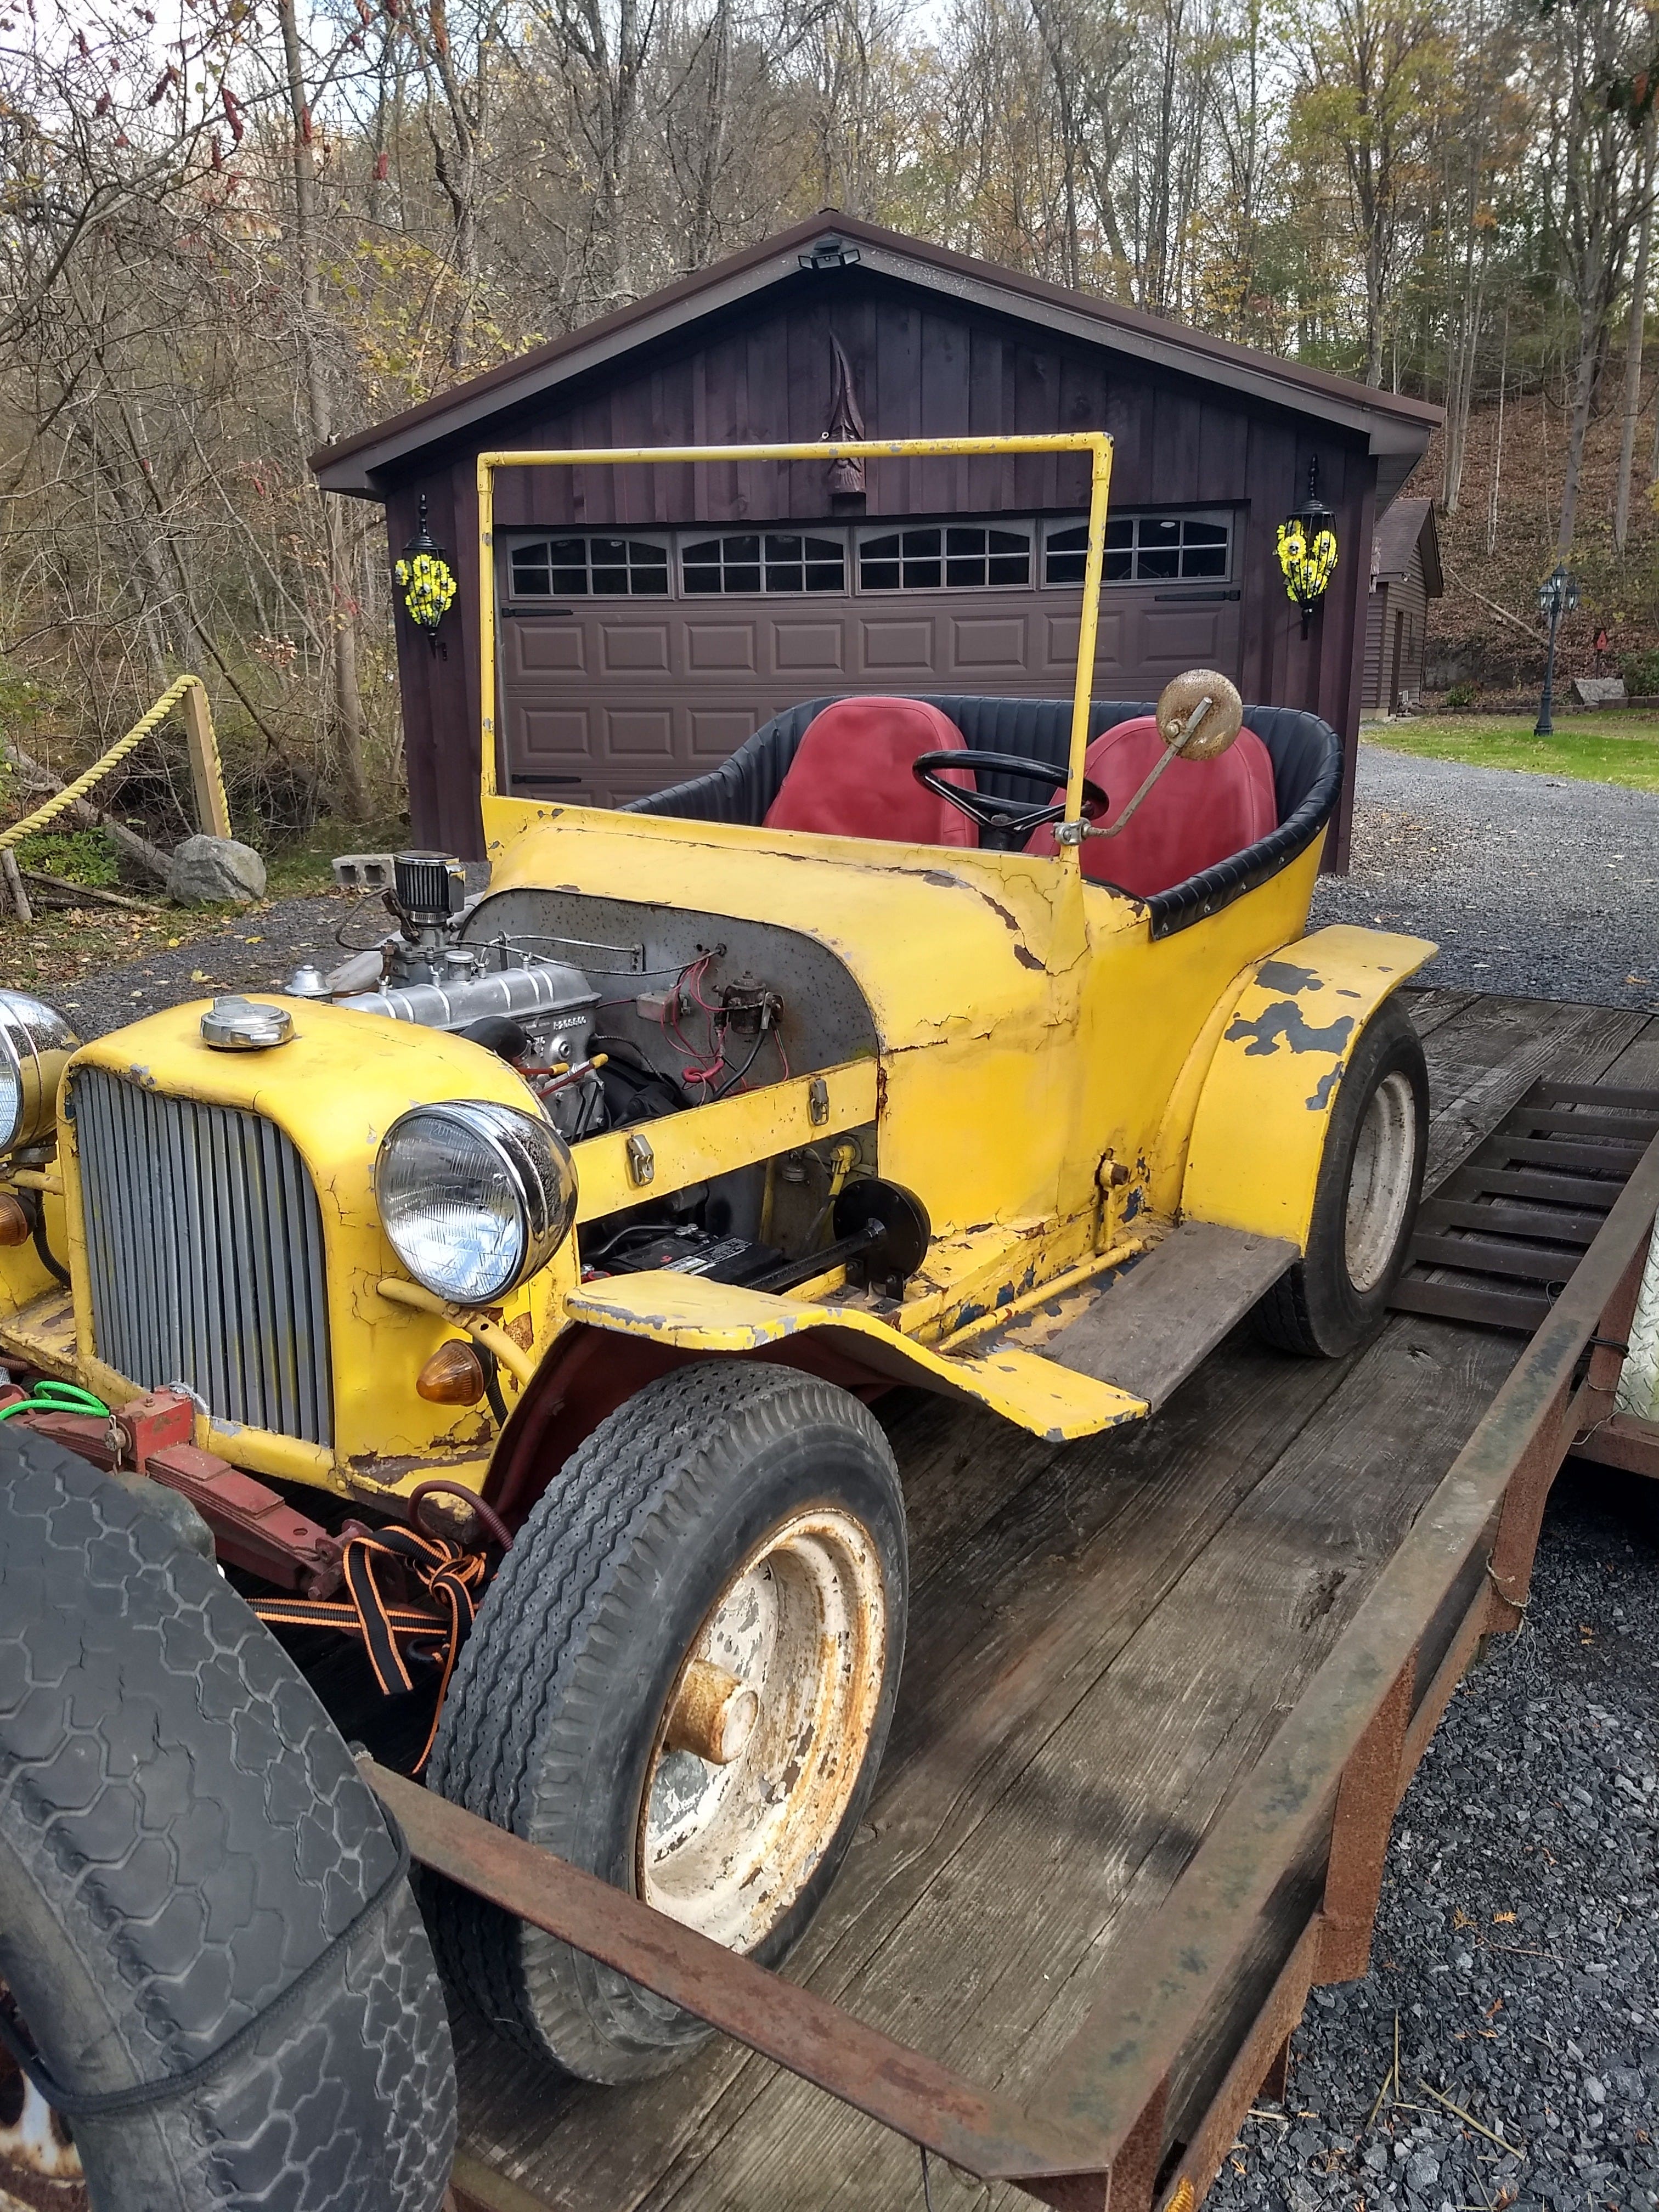
The car was a mix between a T-Bucket and perhaps a Duesenberg due to its large sloping fenders and running boards. The craziest part was that it was tiny. Based on the size of the seats and steering wheel it appeared the car was less than 10’ long! I did what any good Millennial would do and searched Google. It turns out these odd little cars - known as “micro cars” - were manufactured right here in the United States in the 1950s by a radio and appliance pioneer named Powel Crosley. Digging in deeper, I found a few different Crosley models; however, the car on the Facebook ad really didn't look like any of them, so I figured it had to be some sort of custom. Even through the photo I could see rust and bubbling paint, but the interior looked ok and the ad said that it ran. The price was right and I figured it would be a good start for my hot rod project. The seller was roughly an hour and a half away, so I borrowed a friend’s trailer and set out to look at the odd little car.
I took a personal day and headed out to meet the seller and see the Crosley. It turns out the seller, Ryan (who also owned a beautiful ‘34 Ford Coupe) had only owned the car for about a year and had done nothing with it. He said he bought it because he thought it looked cool, but quickly realized it was more work than he was willing to do. He started the engine for me but told me it would not drive because the clutch was frozen. The engine ran and sounded good, but none of the gauges worked, so we didn't run it long. I still really didn't know much about Crosley, so when I looked the car over I wasn't sure if I was looking at genuine Crosley parts or not. I did notice that the chassis was made of box tubing, which is different from what you would expect to see on a traditional c-channel frame. I figured since this was a micro car it would have a smaller frame, so I dismissed it. I gave the car a good look-over and it seemed like a great start for my hot rod project, so we made a deal. I loaded it up onto the trailer and started home…completely unaware of what I had just bought.
Once I got home, I quickly unloaded it and started tinkering. My first task was to try and free the clutch. I knew that sometimes when cars sit for an extended period of time, the clutch will freeze up and rust to the pressure plate. After a little fiddling and adjusting, I was able to get it free. This of course meant that I wanted to try driving it. I fired her up and took a quick lap around the yard (one of the benefits of living out in the country!) Without gauges I didn't know if it had any oil pressure or if the cooling system was working, so it was a short rip, but it ran! I drove my new toy into the garage, where it would live for the next few months. That night, I joined a Facebook group for Crosley car owners and scoured the internet for photos of stock Crosley’s. It didn’t take me long to realize that this Crosley was very different…
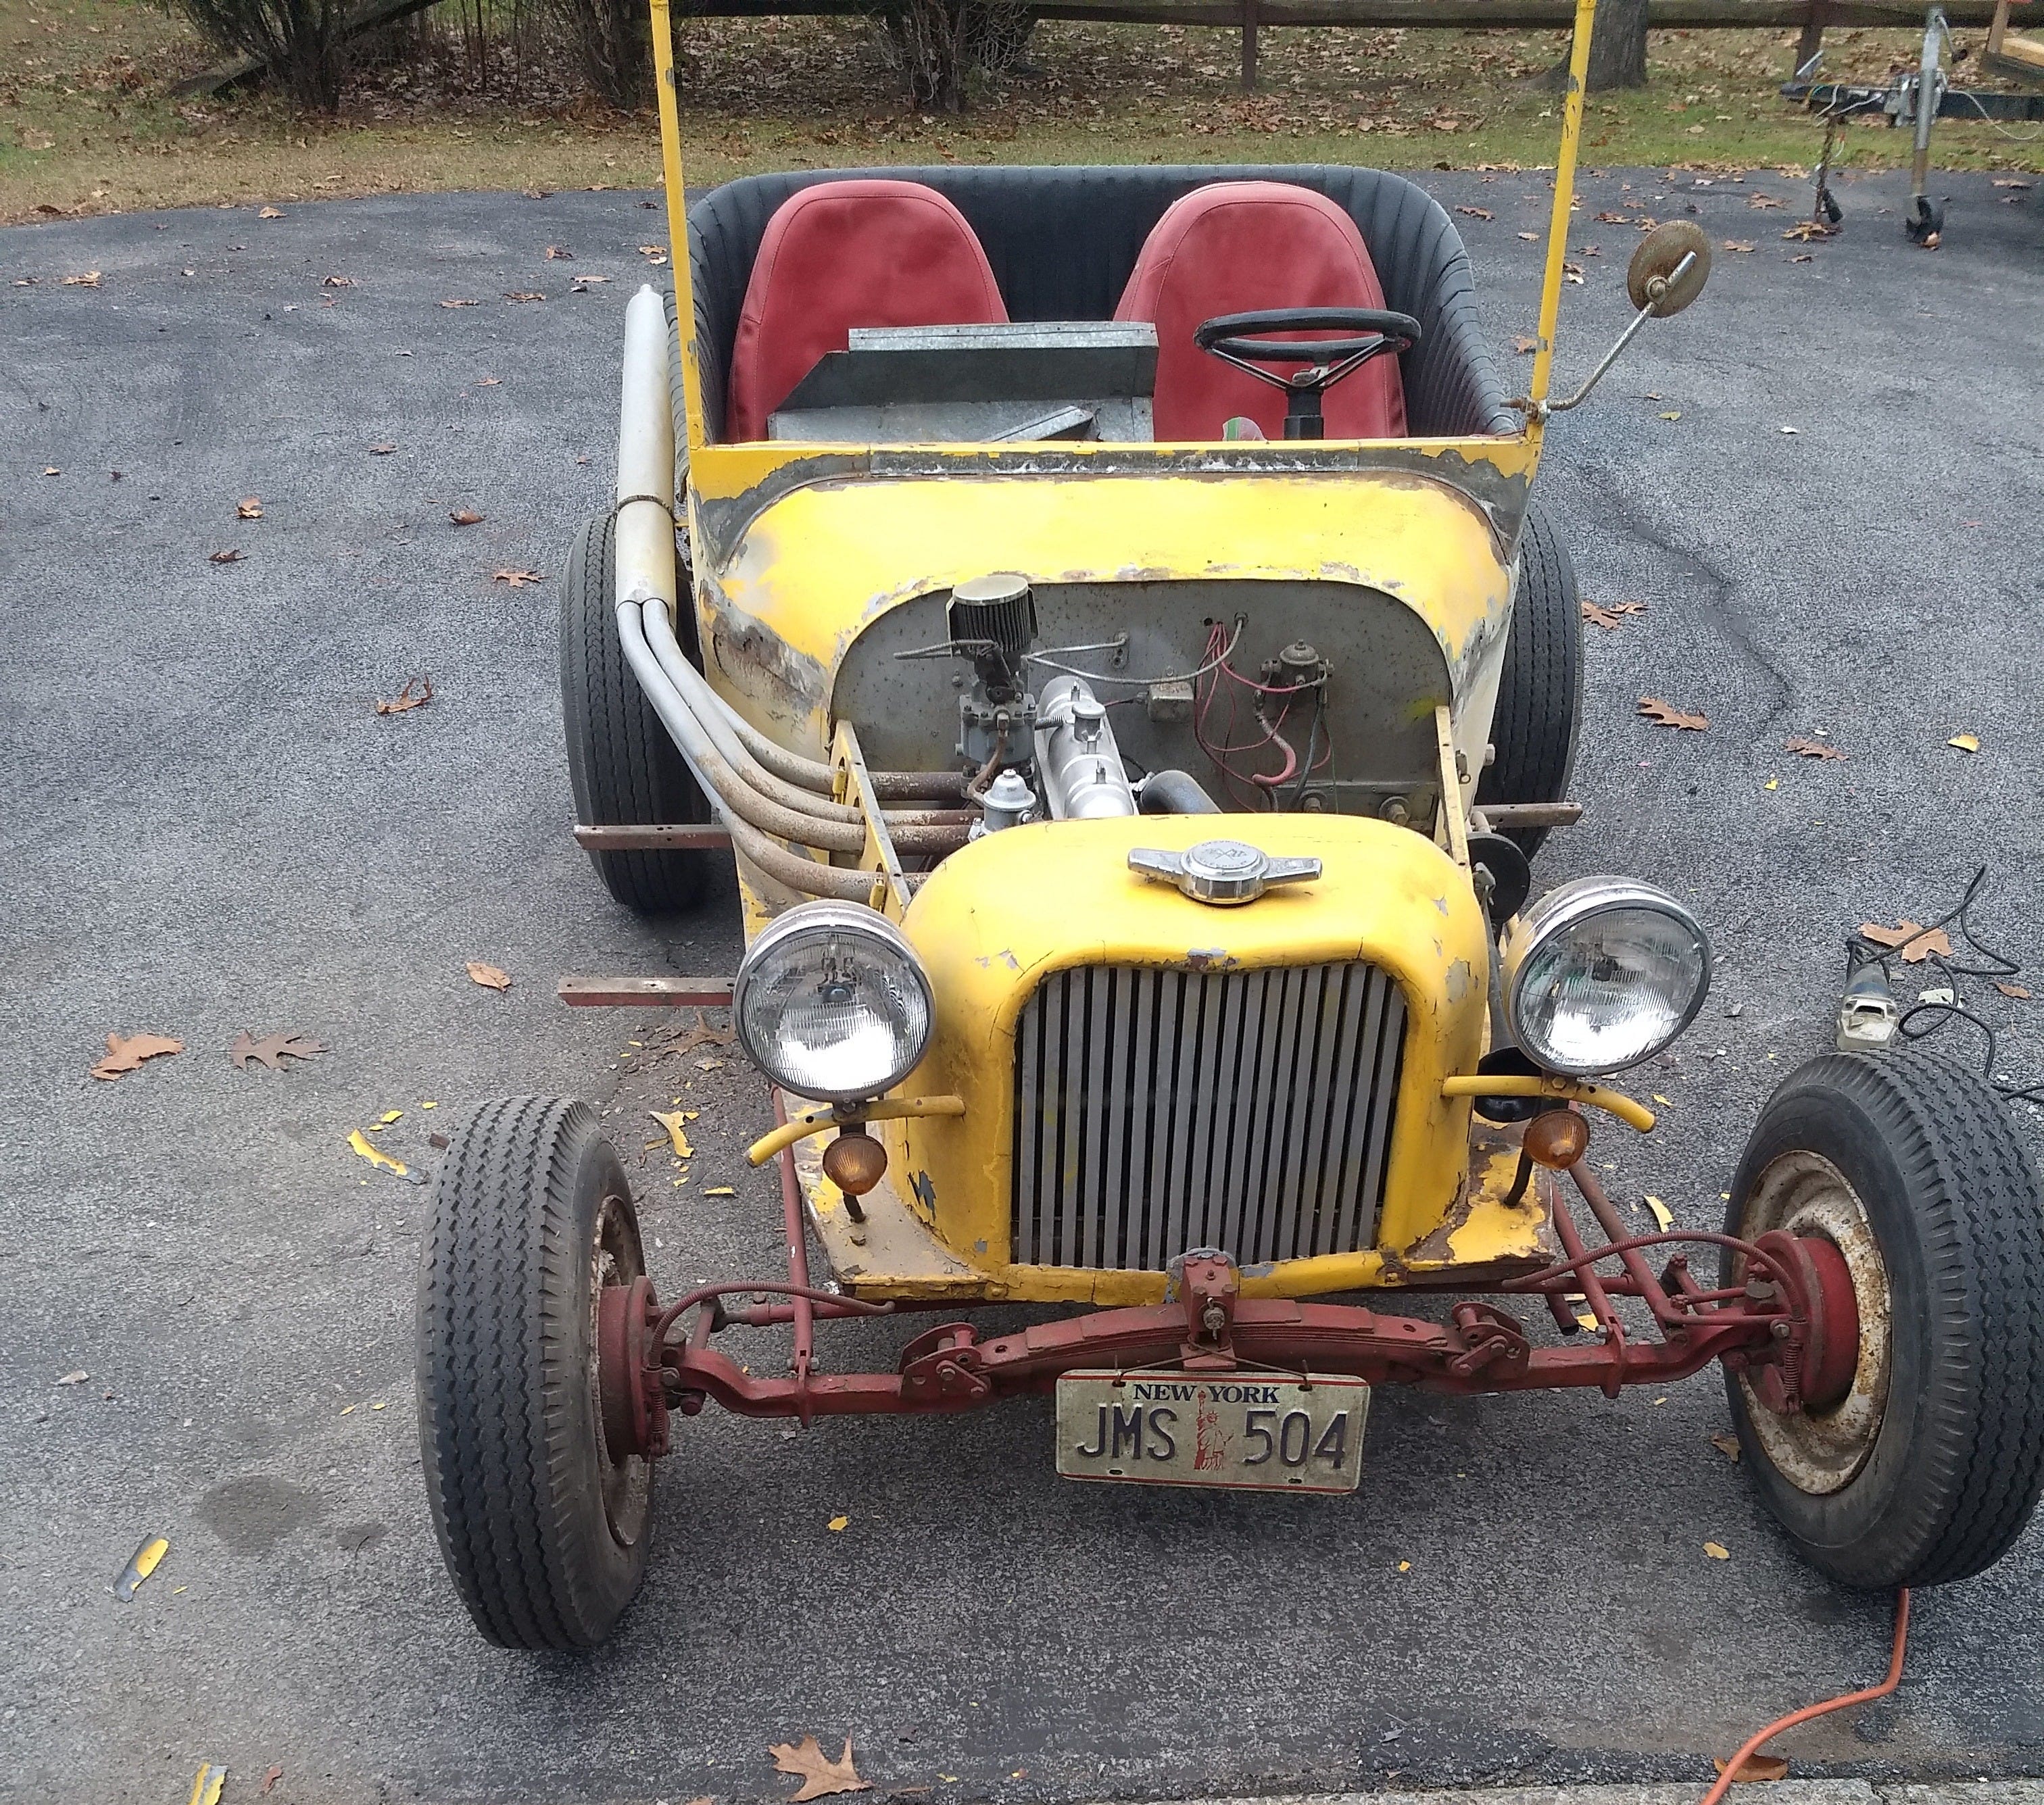
Part of the joy in buying old things is finding out their history. I thought maybe such a unique car would be recognized in the relatively small world of Crosley owners, but no one in the Facebook group had ever seen this car before. The dashboard had plaques from various car shows throughout the mid-1990s in and around the Utica area. Ryan had mentioned that he bought the car from the town next to his where it apparently had a clone, but that’s about all he knew. Since he never registered it, he gave me the previous owner’s registration, so I decided to write him a letter. I let him know that I had purchased the car and was seeking information. I included my phone number and sure enough a few days later I got a call from a guy named Leo.
Leo had owned the Crosley for 20-something years, after inheriting it from his mentor and friend, Don Snook Jr. He went on to tell me an amazing tale about how Don, a successful autocross racer, acquired the little yellow hot rod sometime in the mid-1970s from the guy who built it. He didn’t know the builder, just that he was a tinsmith in the Utica area who built the car in the mid-1960s and then sold it to Don. He already had a Crosley race car, but Don wanted the yellow hot rod to take to car shows. The race car was the clone that Ryan had told me about. After Don's passing in 2000, Leo inherited both the Crosley race car and the hot rod. Unfortunately, he didn’t have the time to work on either of the cars, so he put them both into storage. There they sat until 2022 when he decided to list the hot rod (he kept the race car.) Both cars look similar so I can see why people say they are clones - but they are quite different. They were built by two different individuals and both are highly modified.
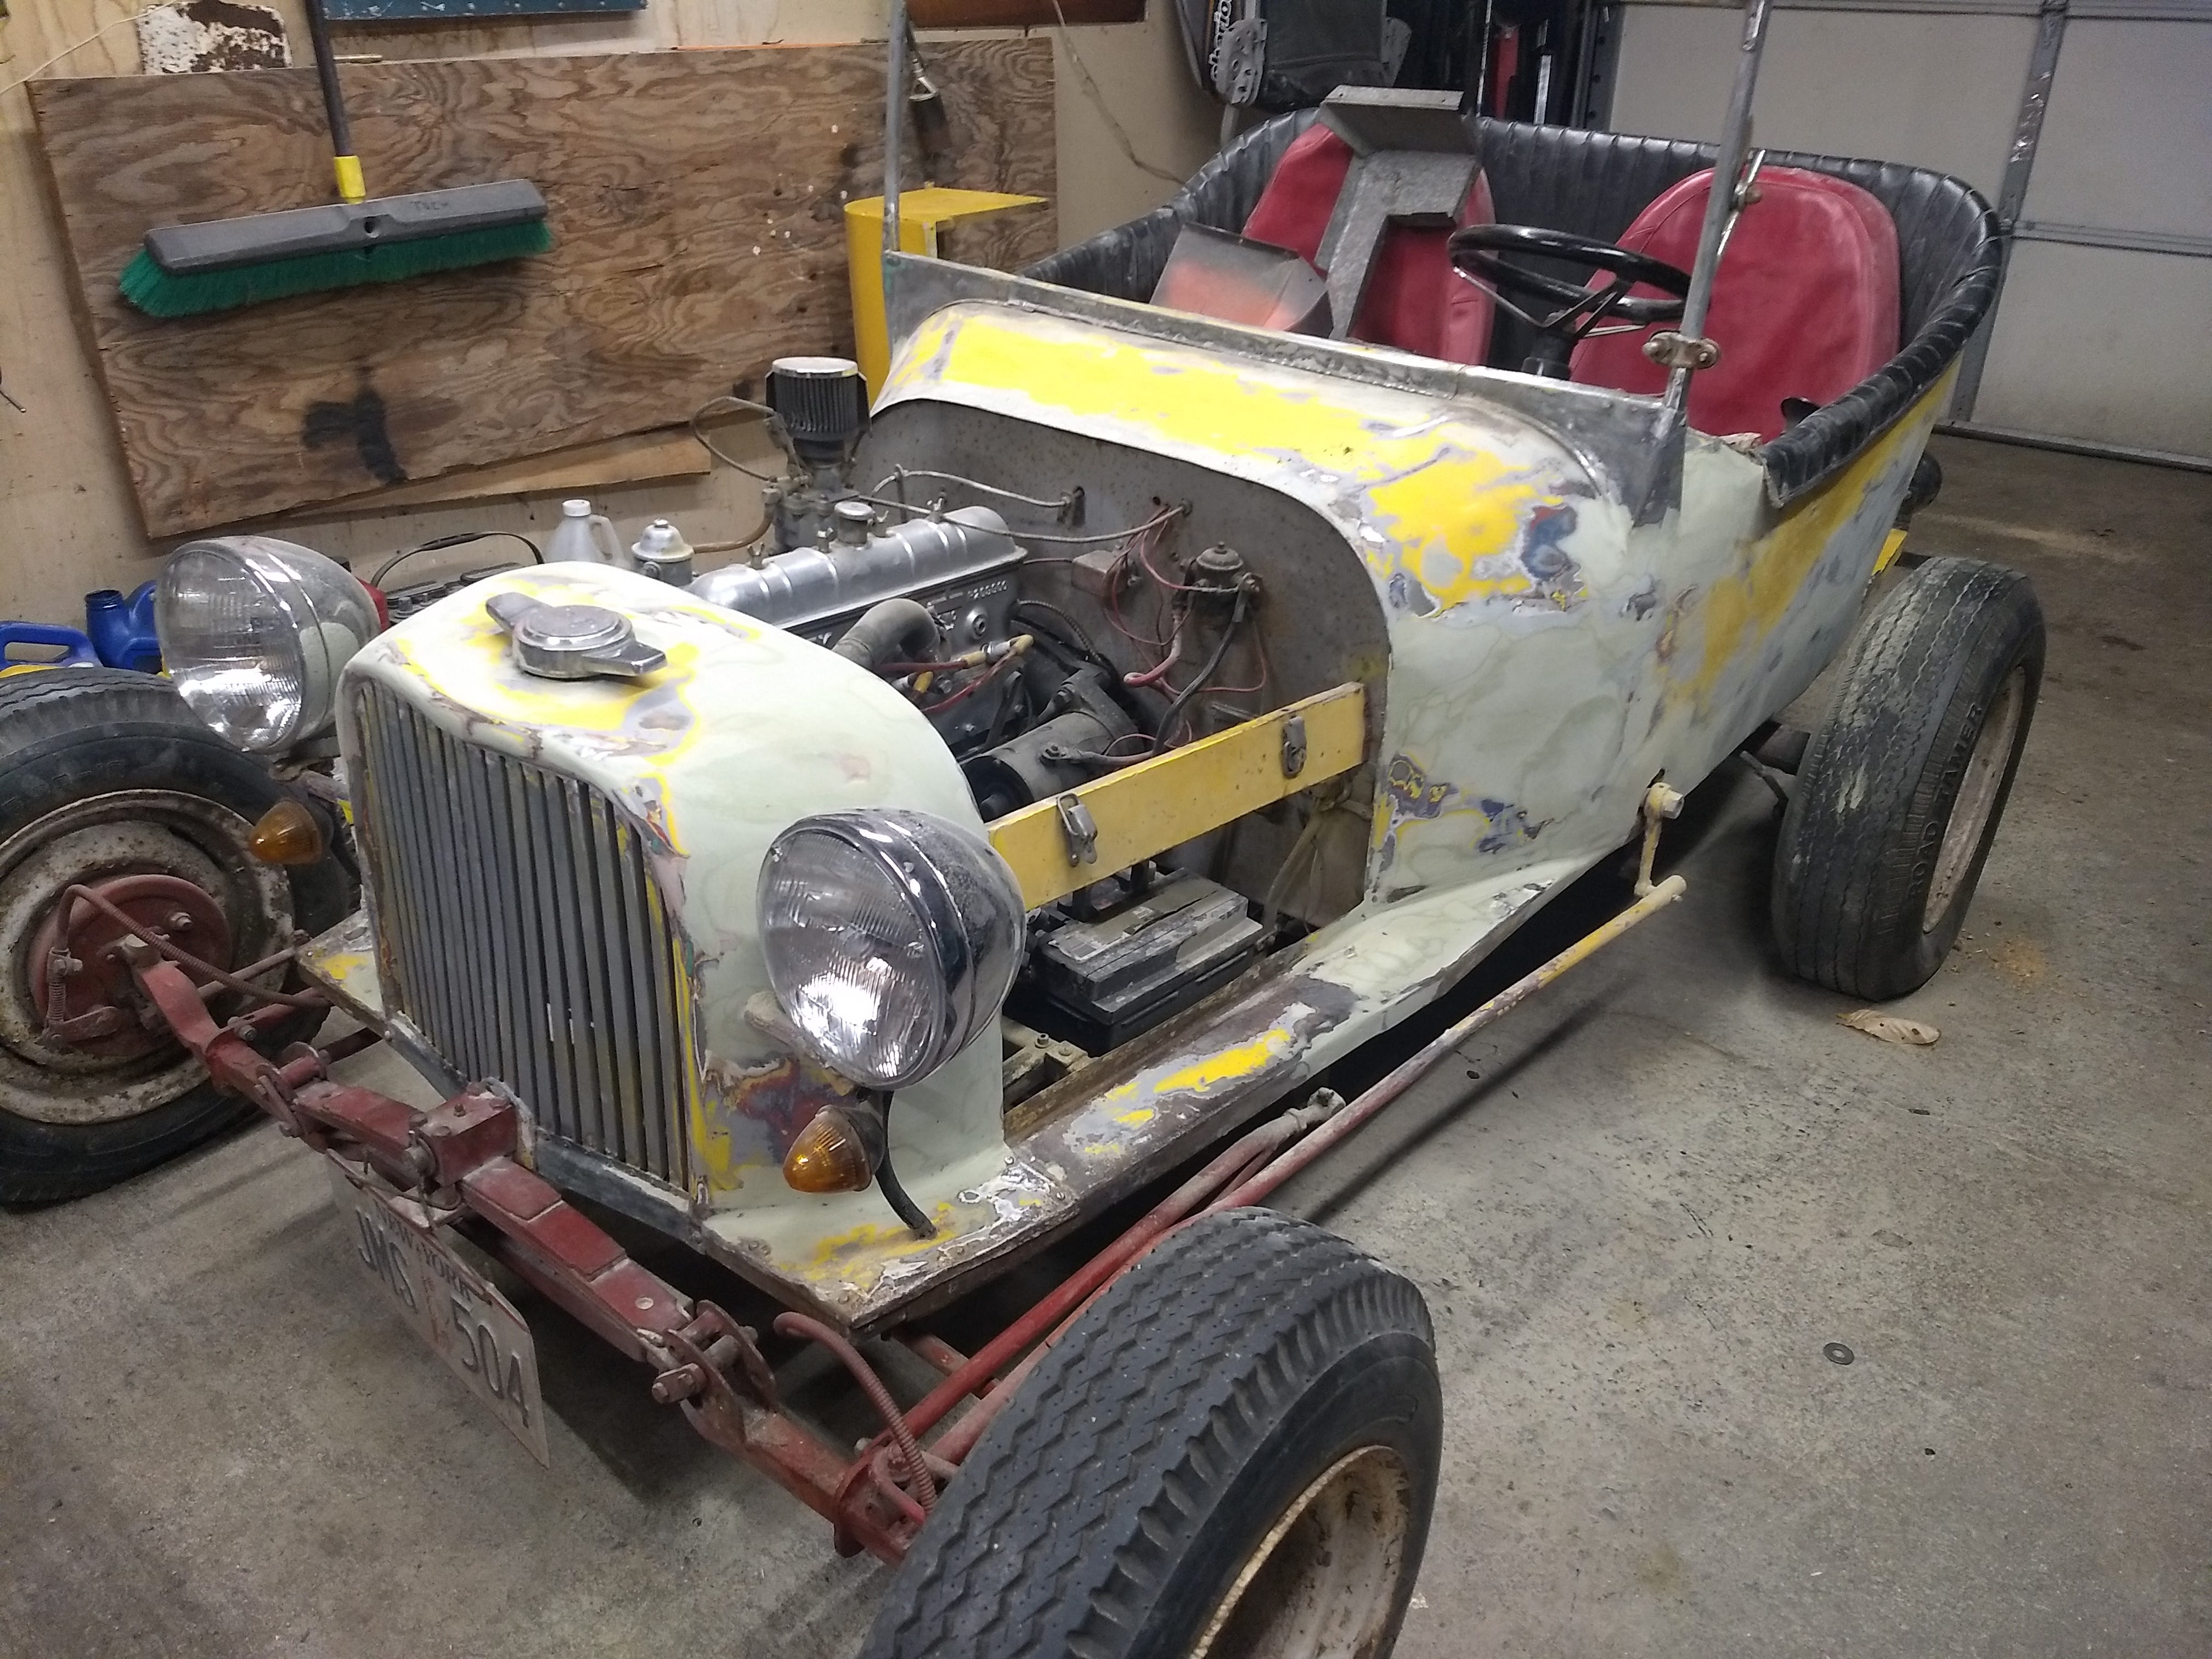
Now that I knew the history of the car, I was ready to get to work. Normally during a refurb you start with the mechanical aspect and do the body last. Since I knew the engine was good, I decided to do the body work first - that way if I lost interest and decided to sell it, I’d have a better chance of making my money back if it looked good. I had Leo's blessing to make modifications and knew the direction I wanted to go. I wanted a 50’s-style hot rod build and was going to go for a bare bones approach. As I stared at the car in my garage, I worked out a vision in my head and quickly realized what had to go first - the fenders and running boards. After drilling out the few rivets and unscrewing the bolts that held them in place, I mercilessly ripped the fenders and running boards off of the car, leaving behind gaping holes. The car was wider than it was long with the fenders, which gave it a very odd appearance. Once I removed the fenders, the car had a sleeker look and resembled the T-Bucket style I was going for.
The windshield frame was very tall, and although it did protect the passengers from wind and rain, it was disproportionately sized to the rest of the car - so I decided to chop the windshield frame and glass. I had never done this before but of course it seemed easy - in theory! Like the rest of the car, the tinsmith had made the windshield frame and had used glass from some other vehicle (which I had no idea what it was) so I needed to be very careful not to break it. After disassembling the frame, I measured (twice) and cut it down to the desired height. To prepare for the hard part (cutting the glass) I watched a bunch of YouTube videos on how to score and break safety glass, which appeared pretty straight forward. I set up a jig on my workbench so I could score and break the glass. Using my glass cutter and jig I scored one side nice and straight. I flipped it over and did the same thing on the other side. Success! Now all I had to do was give it a little bend to fracture it through. I leaned on the glass and heard it crack, but it was breaking where it was supposed to - along the score. A little more weight and a large crack appeared in the glass…but on the side I didn't need, so I kept going. A little more pressure and…crack! Right through the middle of the good side. The windshield was ruined. After mildly panicking, I called a local glass shop and asked what a new rectangular piece of safety glass would cost - and was relieved to hear it would be about $70. Phew! Crisis avoided. Once I picked up the new glass, reassembling it in the freshly painted windshield frame was a breeze. The last hurdle was to weld the new windshield back onto the car, without overheating and cracking the glass. To avoid this, I placed a wet sponge on the glass near the windshield frame and tack welded it together. After grinding down the weld and touching up the paint, the new windshield and frame now sat 8” lower than the original.
Now it was time to chip off all of the bubbling paint and Bondo. I used a chisel and a hammer - and there was a lot of Bondo. A lot. As I chiseled away, it became apparent that most of the body had been entirely fabricated from galvanized sheet metal; and it was completely riveted together - not welded. The guy who built this had a lot of skill when it came to sheet metal work but, he still had to hide a lot of his seams and metal imperfections with body filler, which was quite thick in some places. The metal had started to rust beneath the filler causing it to bubble and lift in many places, so it took me a solid two days to chip off all the loose paint and filler. I spent the next week welding in patches where metal had rusted out, and also welded shut all the rivet holes in the body from where I'd removed the fenders. I sanded the entire car and wire wheeled it until I was left with a raw steel body. Working in my (unheated) garage, I spent the next two and a half winter months in what felt like a never-ending cycle of spreading body filler, sanding, and repeating.
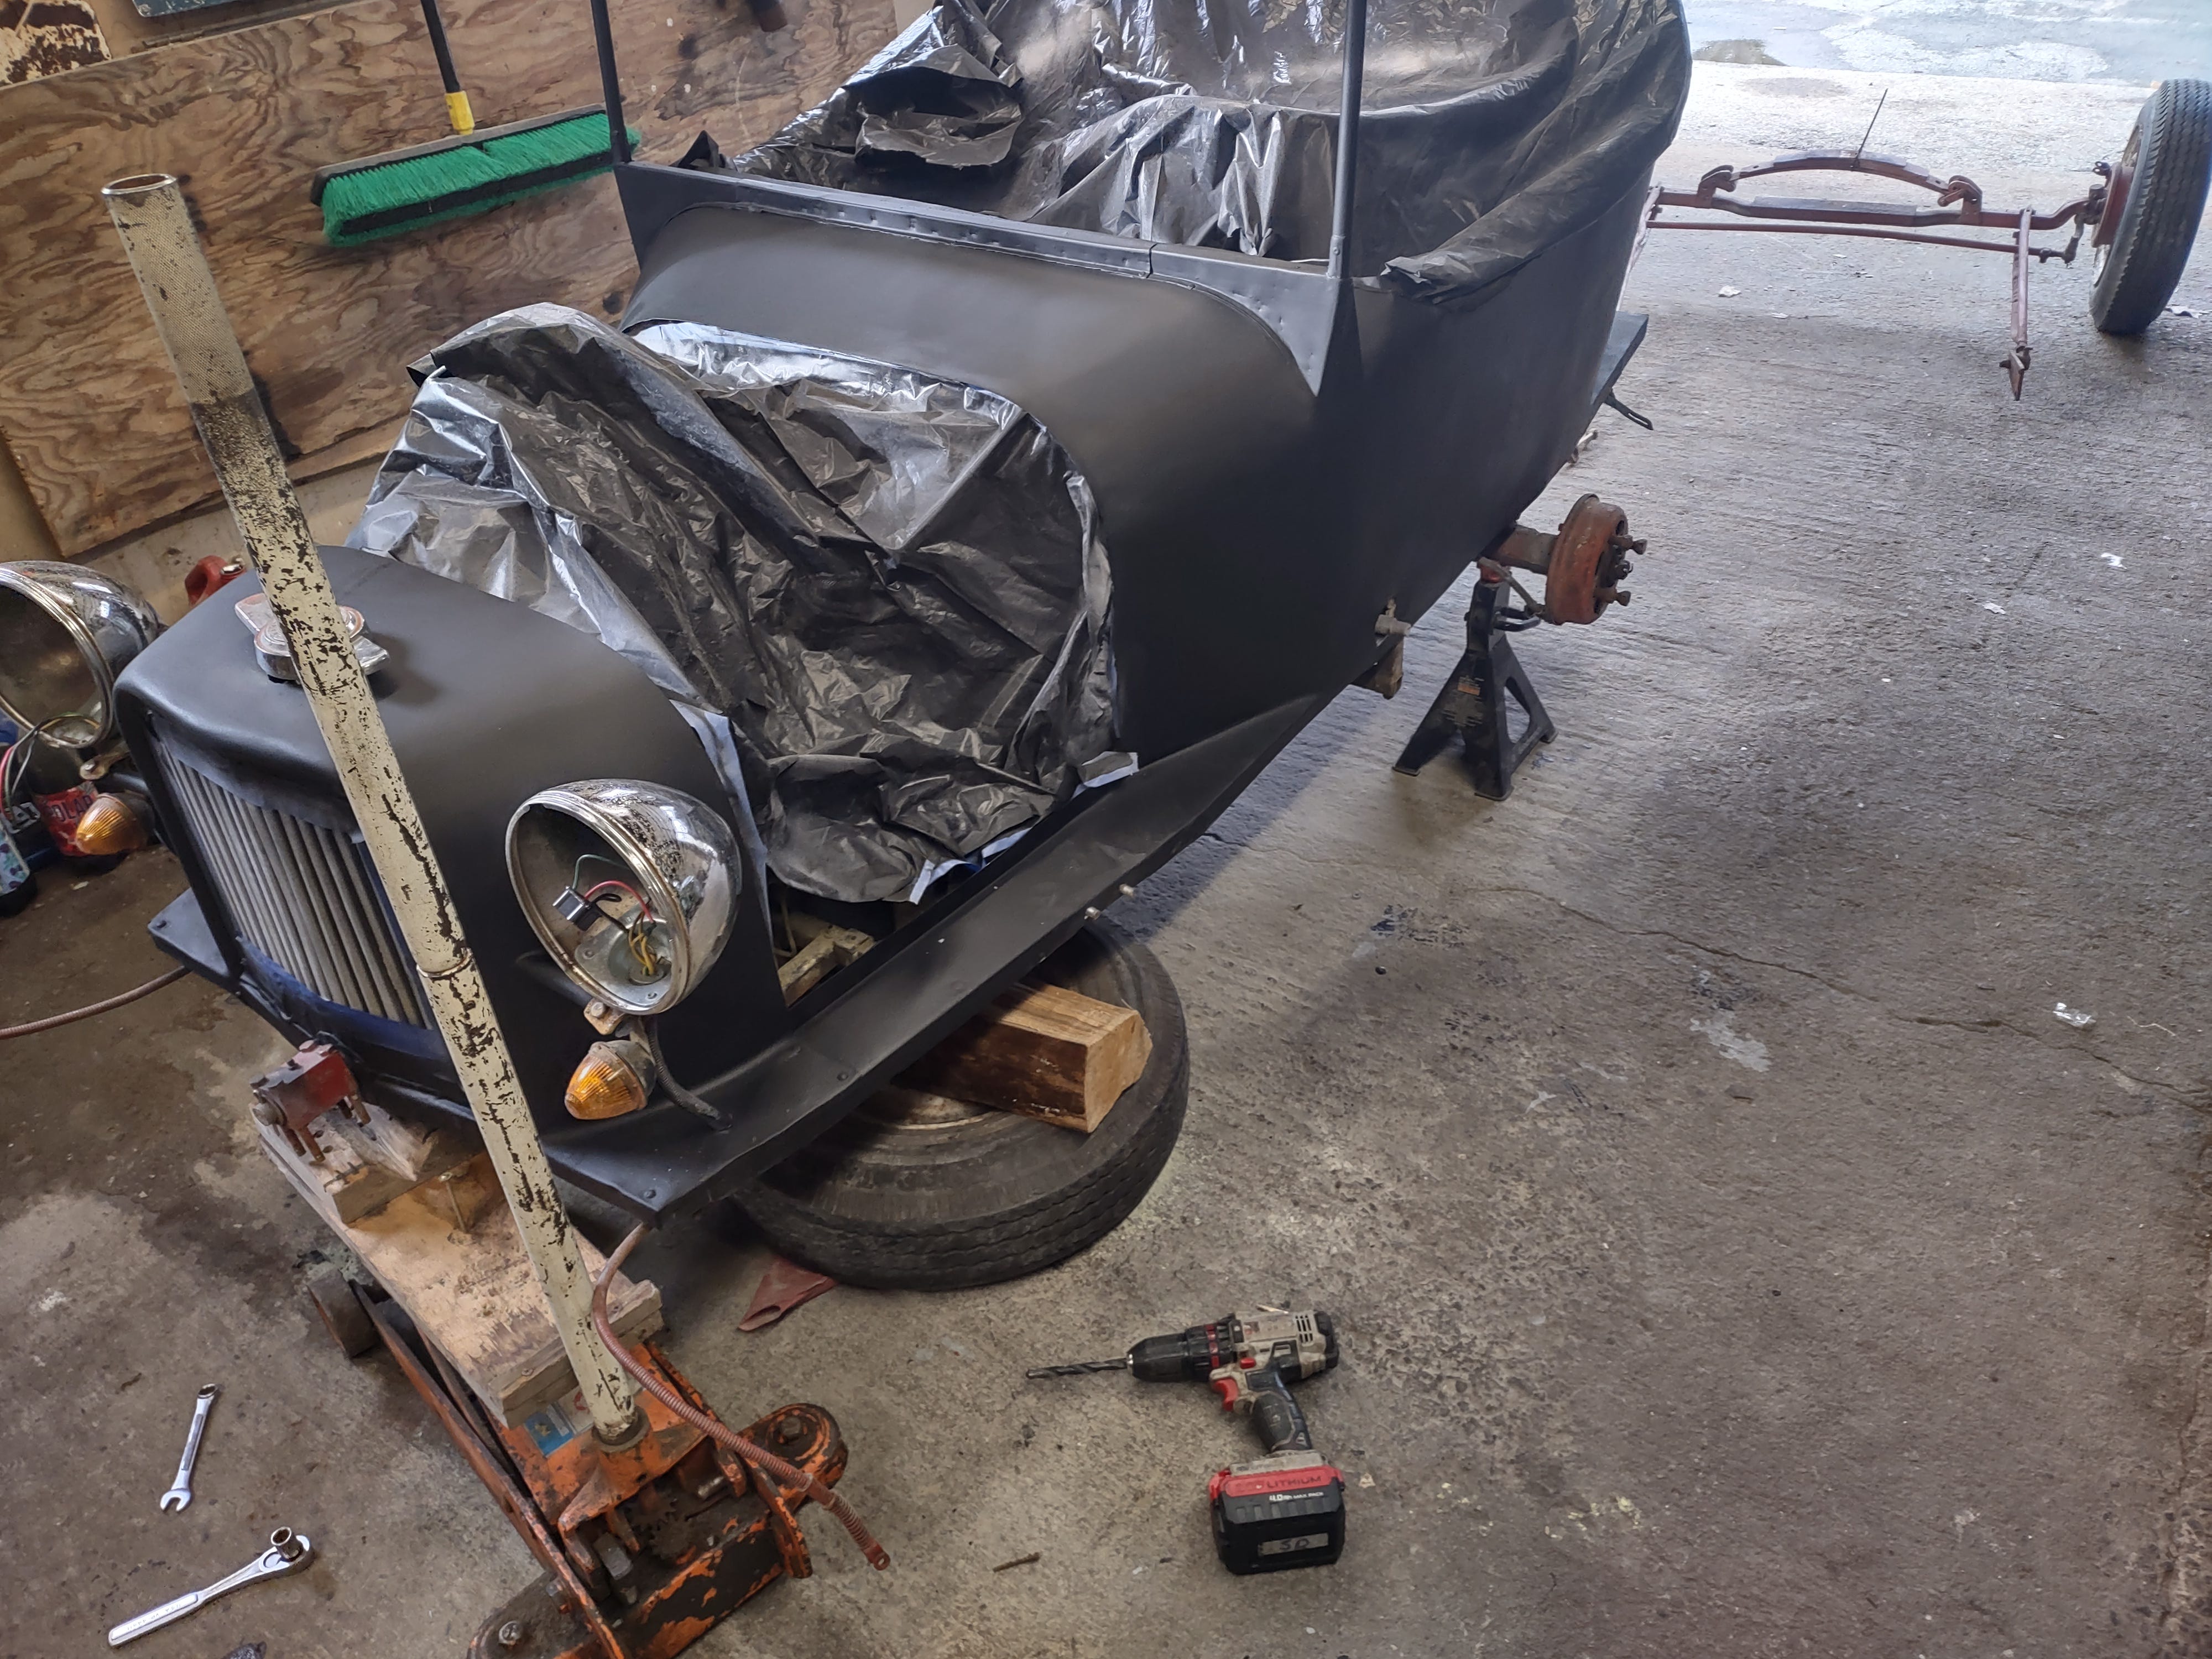
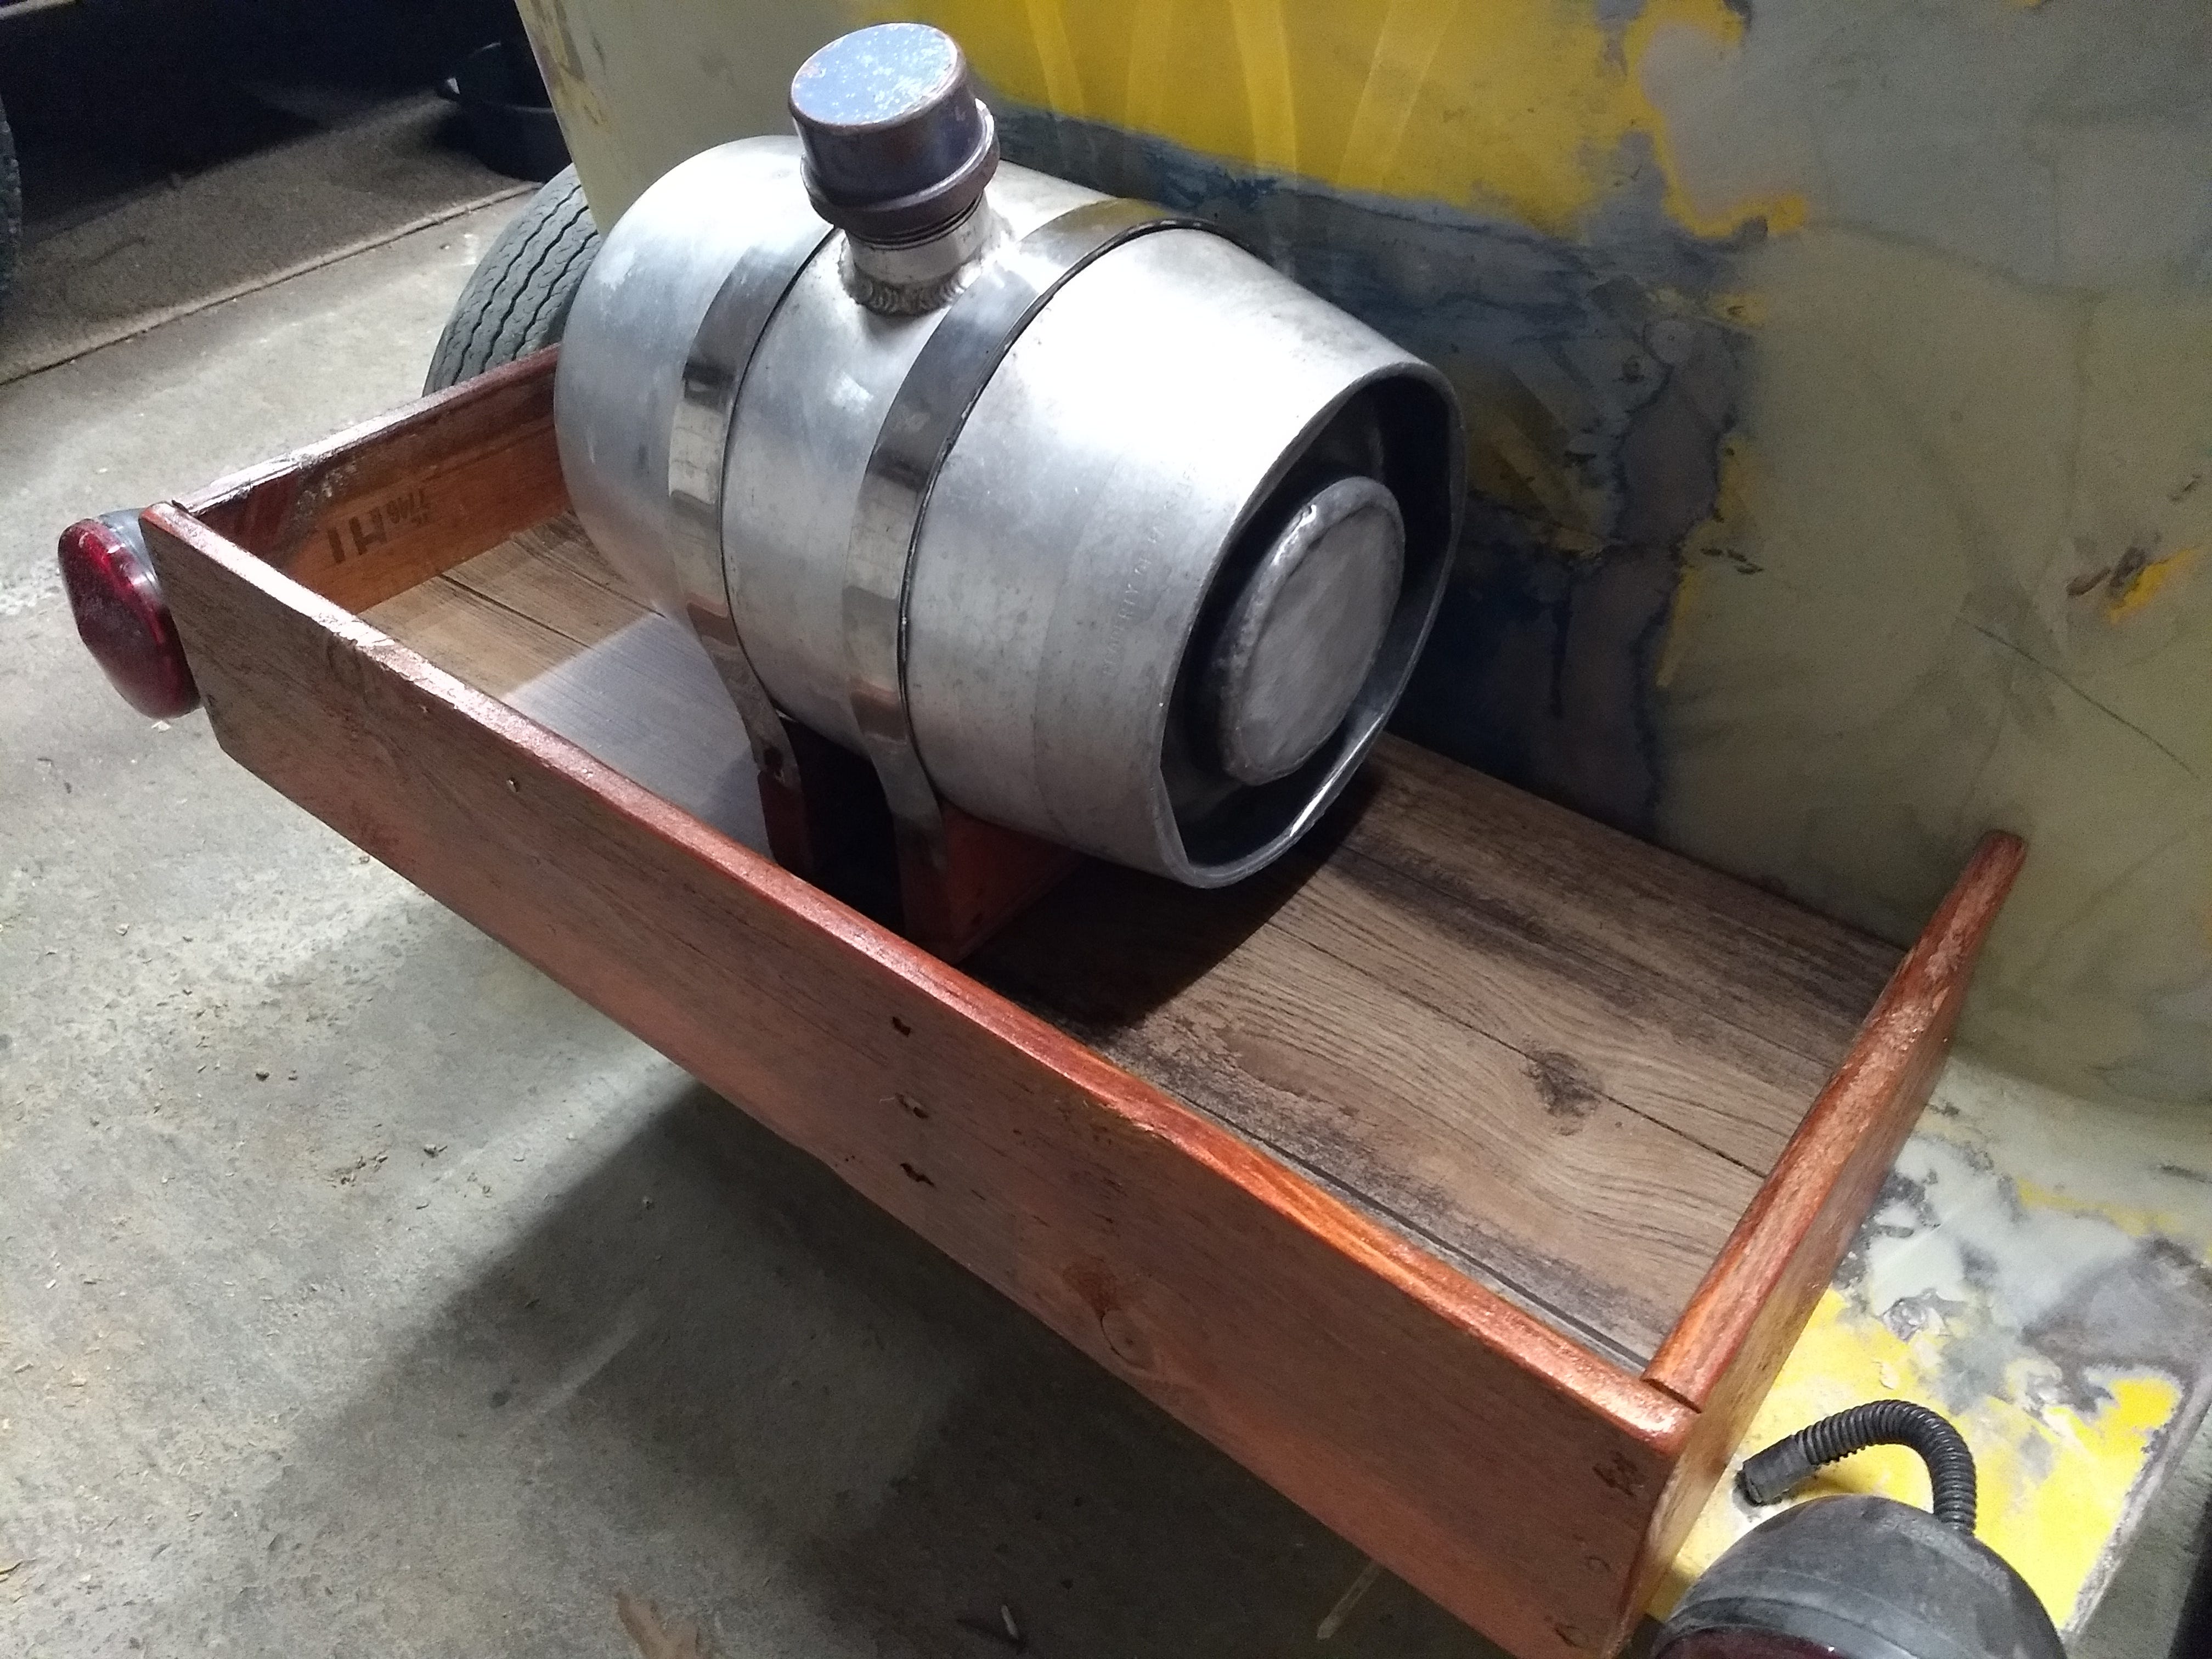
As Spring approached, the body was finally ready for paint. I applied primer and four coats of matte black paint. I was happy with how the body came out, so I moved to the back of the vehicle and made a wooden bed that would house the gas tank - a classic hot rodder style repurposed two and a half gallon keg.
Next, it was time for wheels and tires. The stock wheels were dry rotted, and wouldn’t have worked with my vision anyway. Every good hot rod needs the perfect stance - lower in the front and slightly higher in the back. I wanted white wall tires, which I’d hoped to find at a swap meet (new tires are quite expensive!) In May, I drove down to a large swap meet in Rhinebeck, NY and scored a nice set of white wall rear tires and rims along with the trim rings to complete the look. I found some smaller white wall tires locally on Facebook Marketplace for the front, and ordered some cheap trailer rims that were 2” smaller in diameter than the rear tires. Once all the tires were mounted, I bolted them onto the car and was satisfied with the stance. With the proper wheel and tire combination, I removed the tires and painted the rims cherry red, which was a nice contrast against the white walls and the chrome trim rings. Once the paint was dry, everything went back together and my wheel situation was solved. The aesthetics of the car were coming together (and I was painting stuff which is always gratifying!)
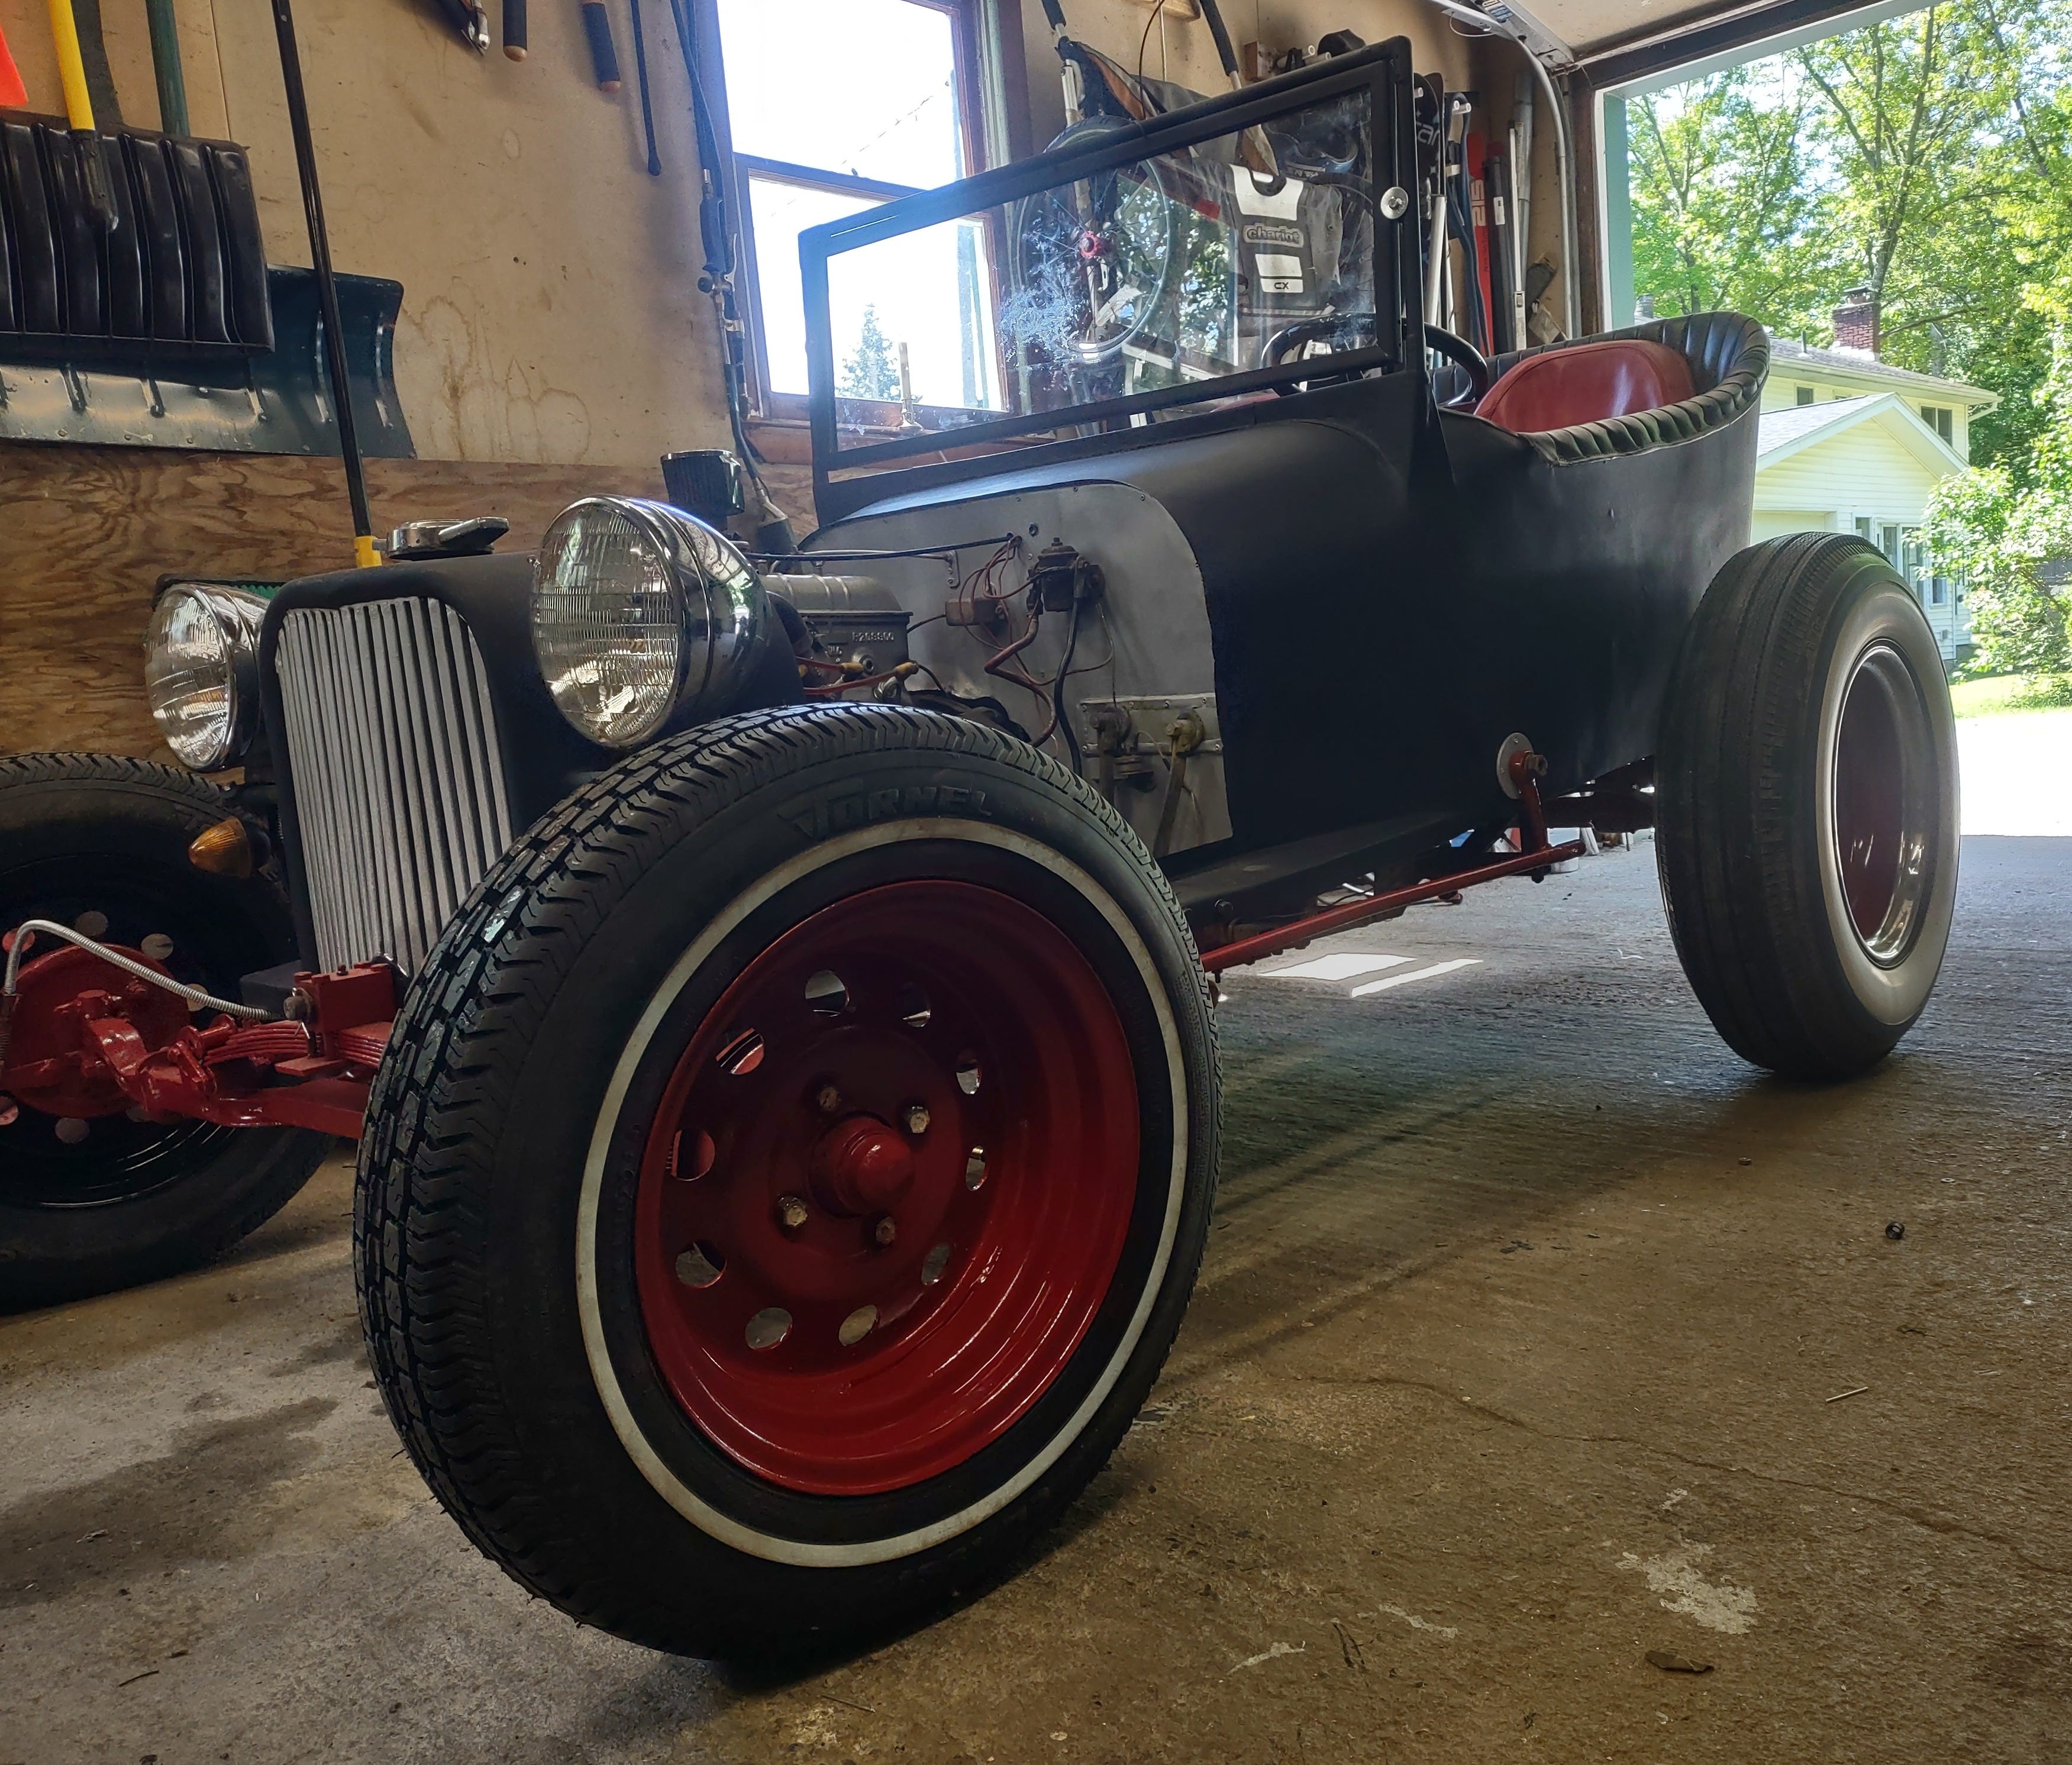
I removed the entire front suspension, disassembled it, and wire wheeled each piece before painting it cherry red. (It’s crazy that the entire front end of the car is held in place with only nine fasteners!) With the front suspension back in place, I used a wire wheel to remove random bits of rust so that I could paint the frame. I discovered a spot that was in really bad shape, so I took the time to grind away the rusted metal and then box in a new frame around the compromised piece. After finishing all of the paint, the body was pretty much done and looking great!
I moved to the interior, which I planned to leave mostly alone, except for the gauge cluster. The original builder had made his own, and it was the focal point of the interior, but unfortunately none of the gauges worked anymore. I wasn’t able to fix the existing cluster, so I decided to make my own. I ordered some generic gauges and laid a template out with pencil and paper. Then I transferred my template to a piece of marine plywood and cut out the holes for the gauges. I really wanted to add some pop so I cut out some vinyl to mimic “engine turned” aluminum, which was popular in the 50’s hot rod scene. I added the vinyl graphic to the marine plywood, added the gauges, and plumed everything in - including the ignition switch and choke lever. There were a lot of electrical connections, so I was sure to disconnect the battery before install to avoid any arcing of wires. After everything was wired up, I hooked up the battery and a huge plume of smoke erupted from under the dash. I quickly disconnected the battery (and grabbed my fire extinguisher, though luckily didn’t need it) and discovered the copper oil pressure line was touching one of the electrical terminals on the gauges, which caused a dead short to ground instantly and melt one of the electrical wires. Fortunately, the only casualty was one damaged wire, so I moved the copper oil pressure line safely away and replaced it. I hooked the battery back up and this time the garage stayed smoke-free.
Since the car had sat for so long, I gave the carburetor a good clean, and was finally ready to see if this thing would run and drive...I had only heard the Crosley run once before I started on the body restoration, and I never drove it because the clutch was frozen. (At this point, my wife thought I was a touch nuts for doing all this work on a car that might not even drive…but she trusts me, so when I said I’d still make my money back even if I sold it as is, she sent me back to the garage and told me to keep having fun!)
After futzing with the starter I was able to get the car running again. I focused my eyes on my newly made gauge cluster to check my oil pressure. The oil reading was low and went nearly to zero when I revved the engine - a tell tale sign of a clogged oil pickup. So, I spent the next few days dropping the oil pan and pulling 30 years worth of gunk from the oil pickup and praying it hadn’t wrecked the engine. Lucky for me it hadn’t, and the oil pressure was now steady. The car ran well and the freshly rebuilt carb had the little Crosley singing nicely.
By now it was late June and I really wanted to finish the car in time to drive it to school. I took a few test rides around a nearby neighborhood and discovered the car had terrible handling due to its lack of shocks, and that the clutch was making a lot of noise. To top it off, just over a mile from my house something in the transmission let go and I was forced to push the car home. (Not a huge deal since the car only weighs 800 pounds, but I’m sure I gave the folks driving down our road something to chuckle about!) Back at my garage, further inspection revealed the clutch plate teeth were stripped due to an improper plate being fitted years ago, which meant the clutch needed to be replaced. On a Crosley, this is an engine-out-of-the-car job, so my freshly finished hot rod was going back into the garage to get its heart ripped out.
Have you ever heard the saying, “opening a can of worms?” Well, that's what this turned into. I pulled the engine out and discovered the bellhousing was cracked all the way across, and would need to be replaced. While not a big deal on most cars, Crosley was unique in that they had a special 2-piece bellhousing, and both parts have to be machined to match; you simply cannot just replace one side. Also, on a Crosley the bellhousing removal requires that the engine crankshaft has to come out as well. This process requires a highly skilled, well-seasoned engine builder, which was beyond my abilities. So now I not only had a good looking - but broken - hot rod, it needed serious engine surgery.
Back to the internet I went, and it turns out I could only find two guys in the US who allegedly have the skills and special tooling to rebuild Crosley engines. One of them, Barry, lives in southern Pennsylvania, conveniently on the way to Hershey Park where my family just happened to be going in a few weeks (is that fate or what?!) I got a hold of Barry, who said he could fix the engine in 2-3 days while we enjoyed our time at the chocolate theme park - how convenient! So off we went to PA with my Crosley engine in the back of our Tahoe in between the suitcases and the kids snacks (did I mention my wife is awesome for putting up with me and my hot rod dream?) Three hours later, we arrived in the middle of nowhere PA. It was perfect timing to get out of the car, so my wife and kids sat on the grass and ate sandwiches while I ogled more Crosley parts than I had ever seen. When I was given “the look” that indicated my time was up, we all climbed back into the (much more spacious) Tahoe and continued on to Hershey.
The next day Barry called me with bad news. The inside of the engine was in worse shape than I’d realized, and while he wanted to completely rebuild it, we agreed on a “mild” rebuild. This was an additional expense that I hadn’t planned on, but I didn’t have a whole lot of options so I bit the bullet. He’d also fix the issues with the clutch. As promised, 2 days later we drove back to his house and loaded up the “new to me” engine and headed back home. I was so excited that I installed the new engine that night. Everything worked perfectly. Well, except for the fact that when I took it out for a test drive the car got a death wobble around 30mph since there were no shocks, only springs, and I was bouncing around like crazy! With two car shows on the horizon, I had to address the handling issue. I got busy fabricating shock mounts and sourced some ATV shocks to act as dampeners. Once mounted, they looked great and functioned as planned - really improving the ride. The Crosley was finally complete!
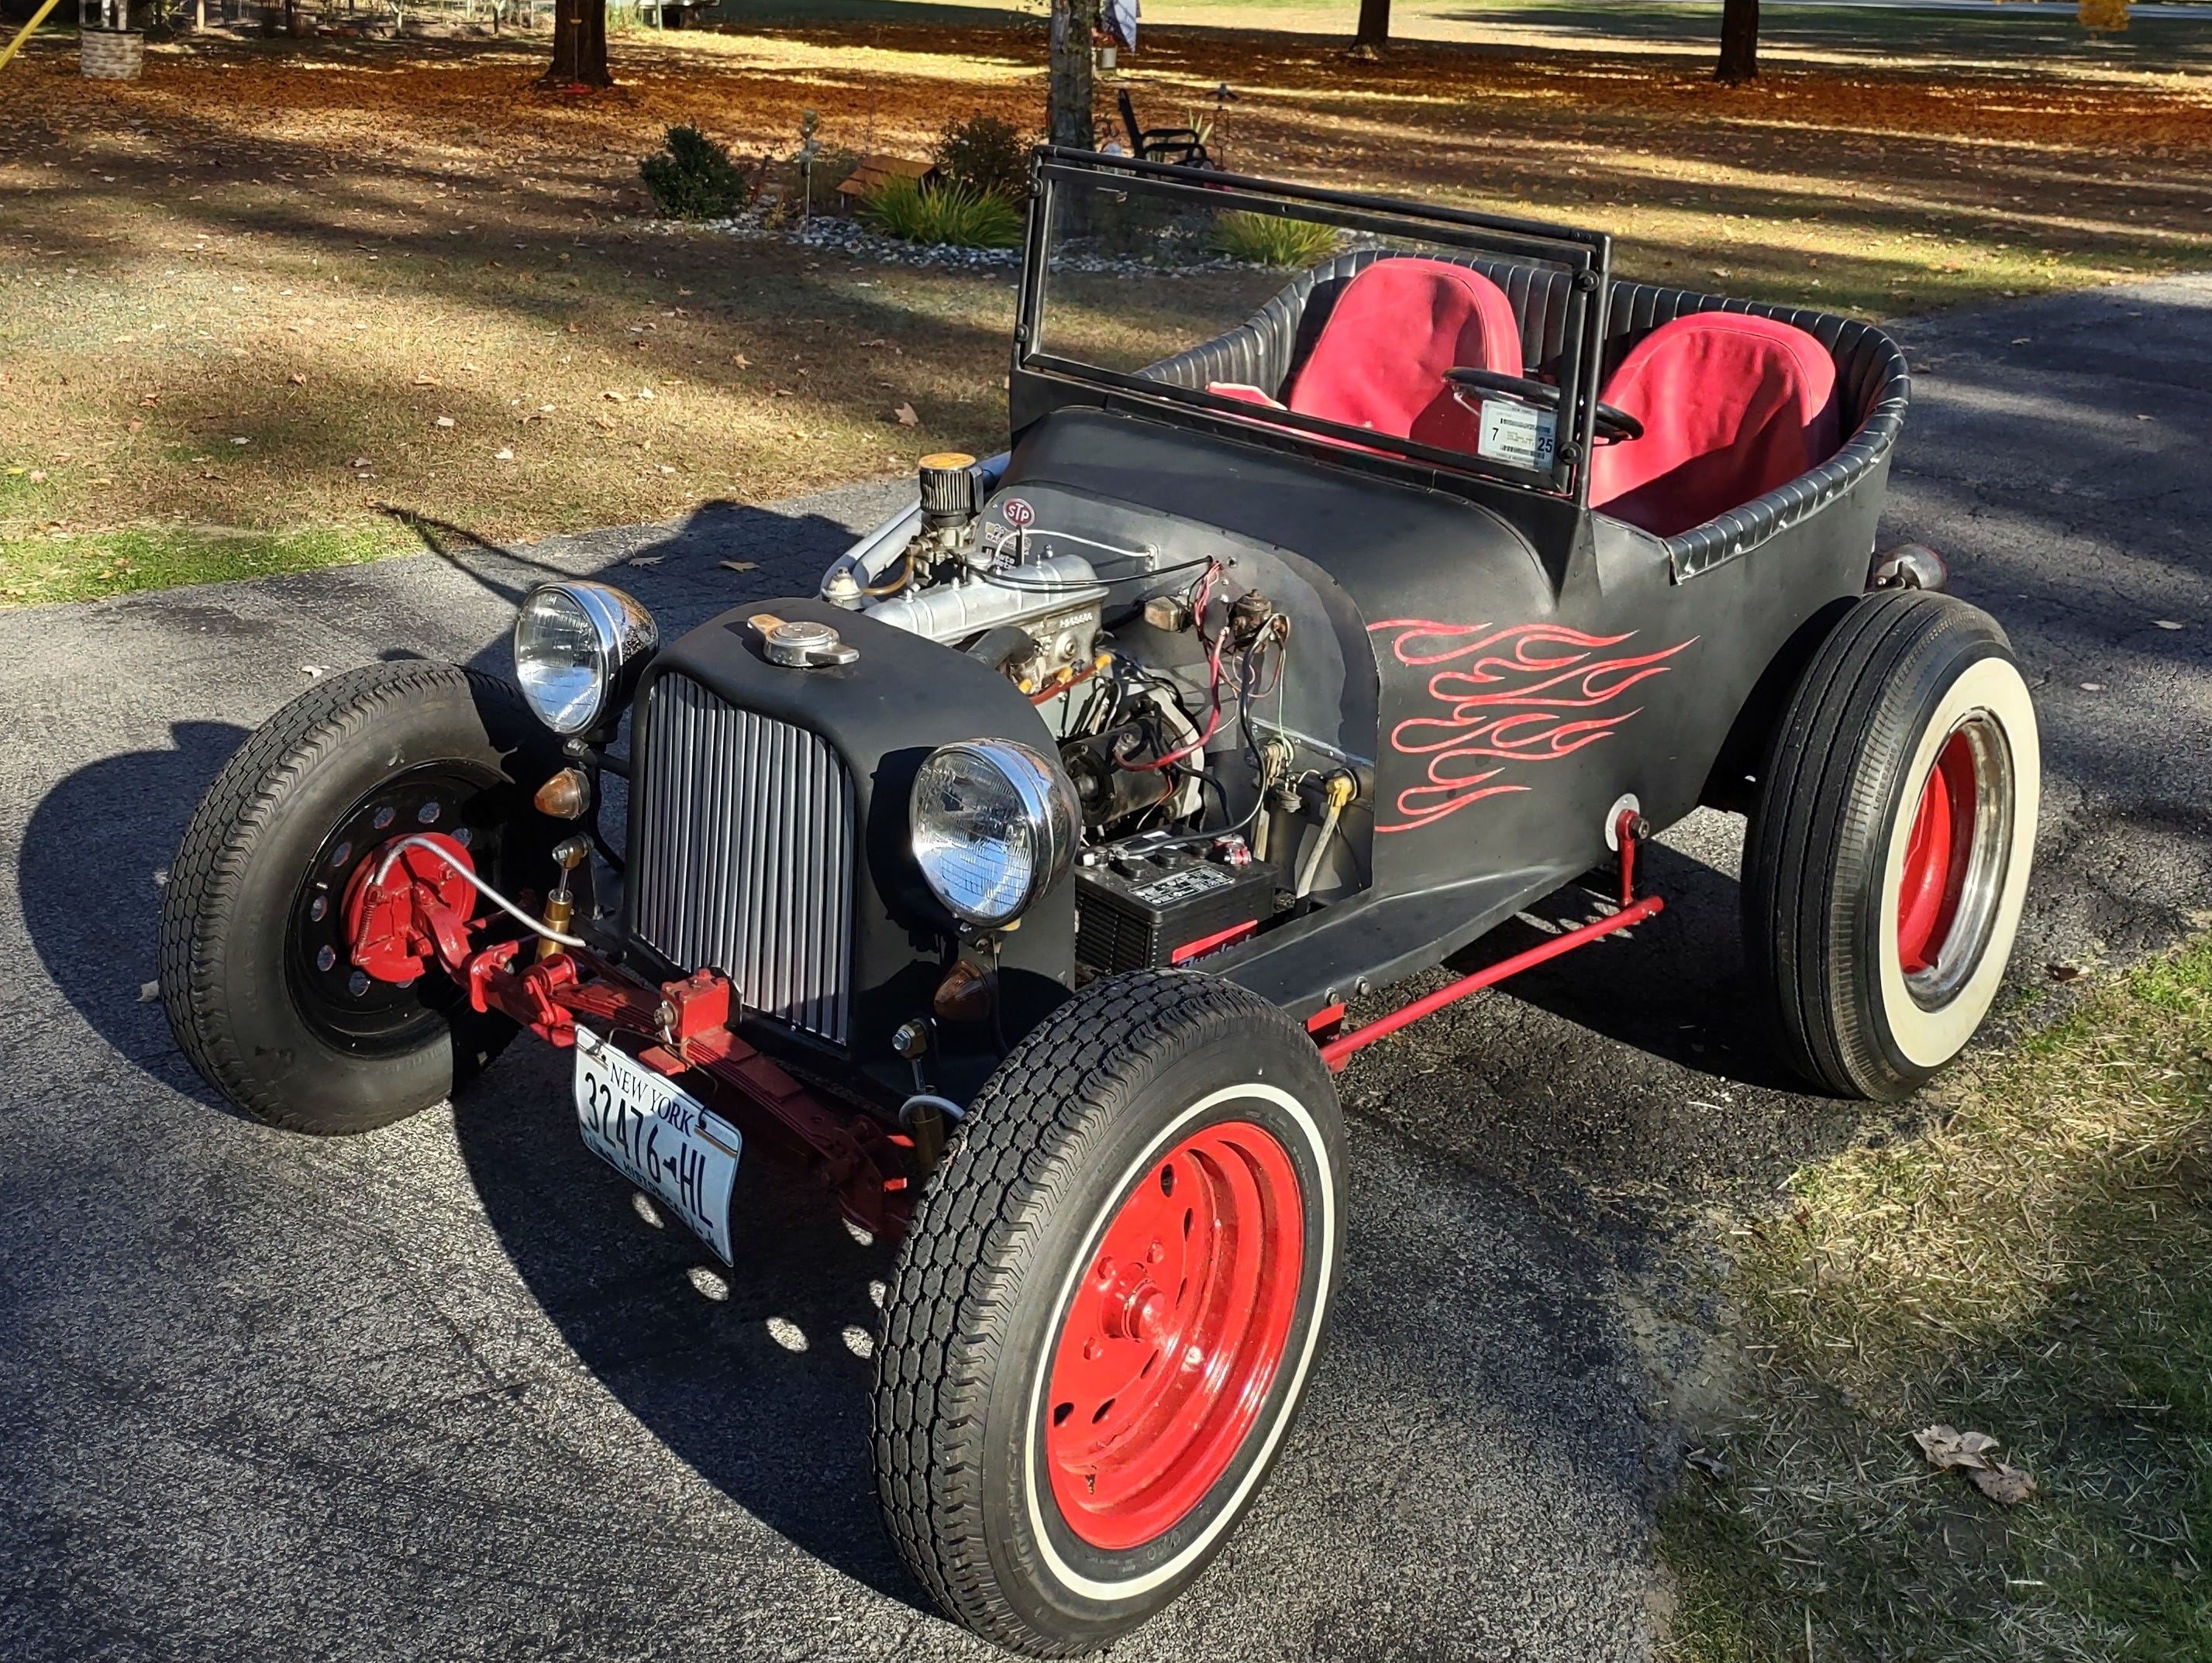
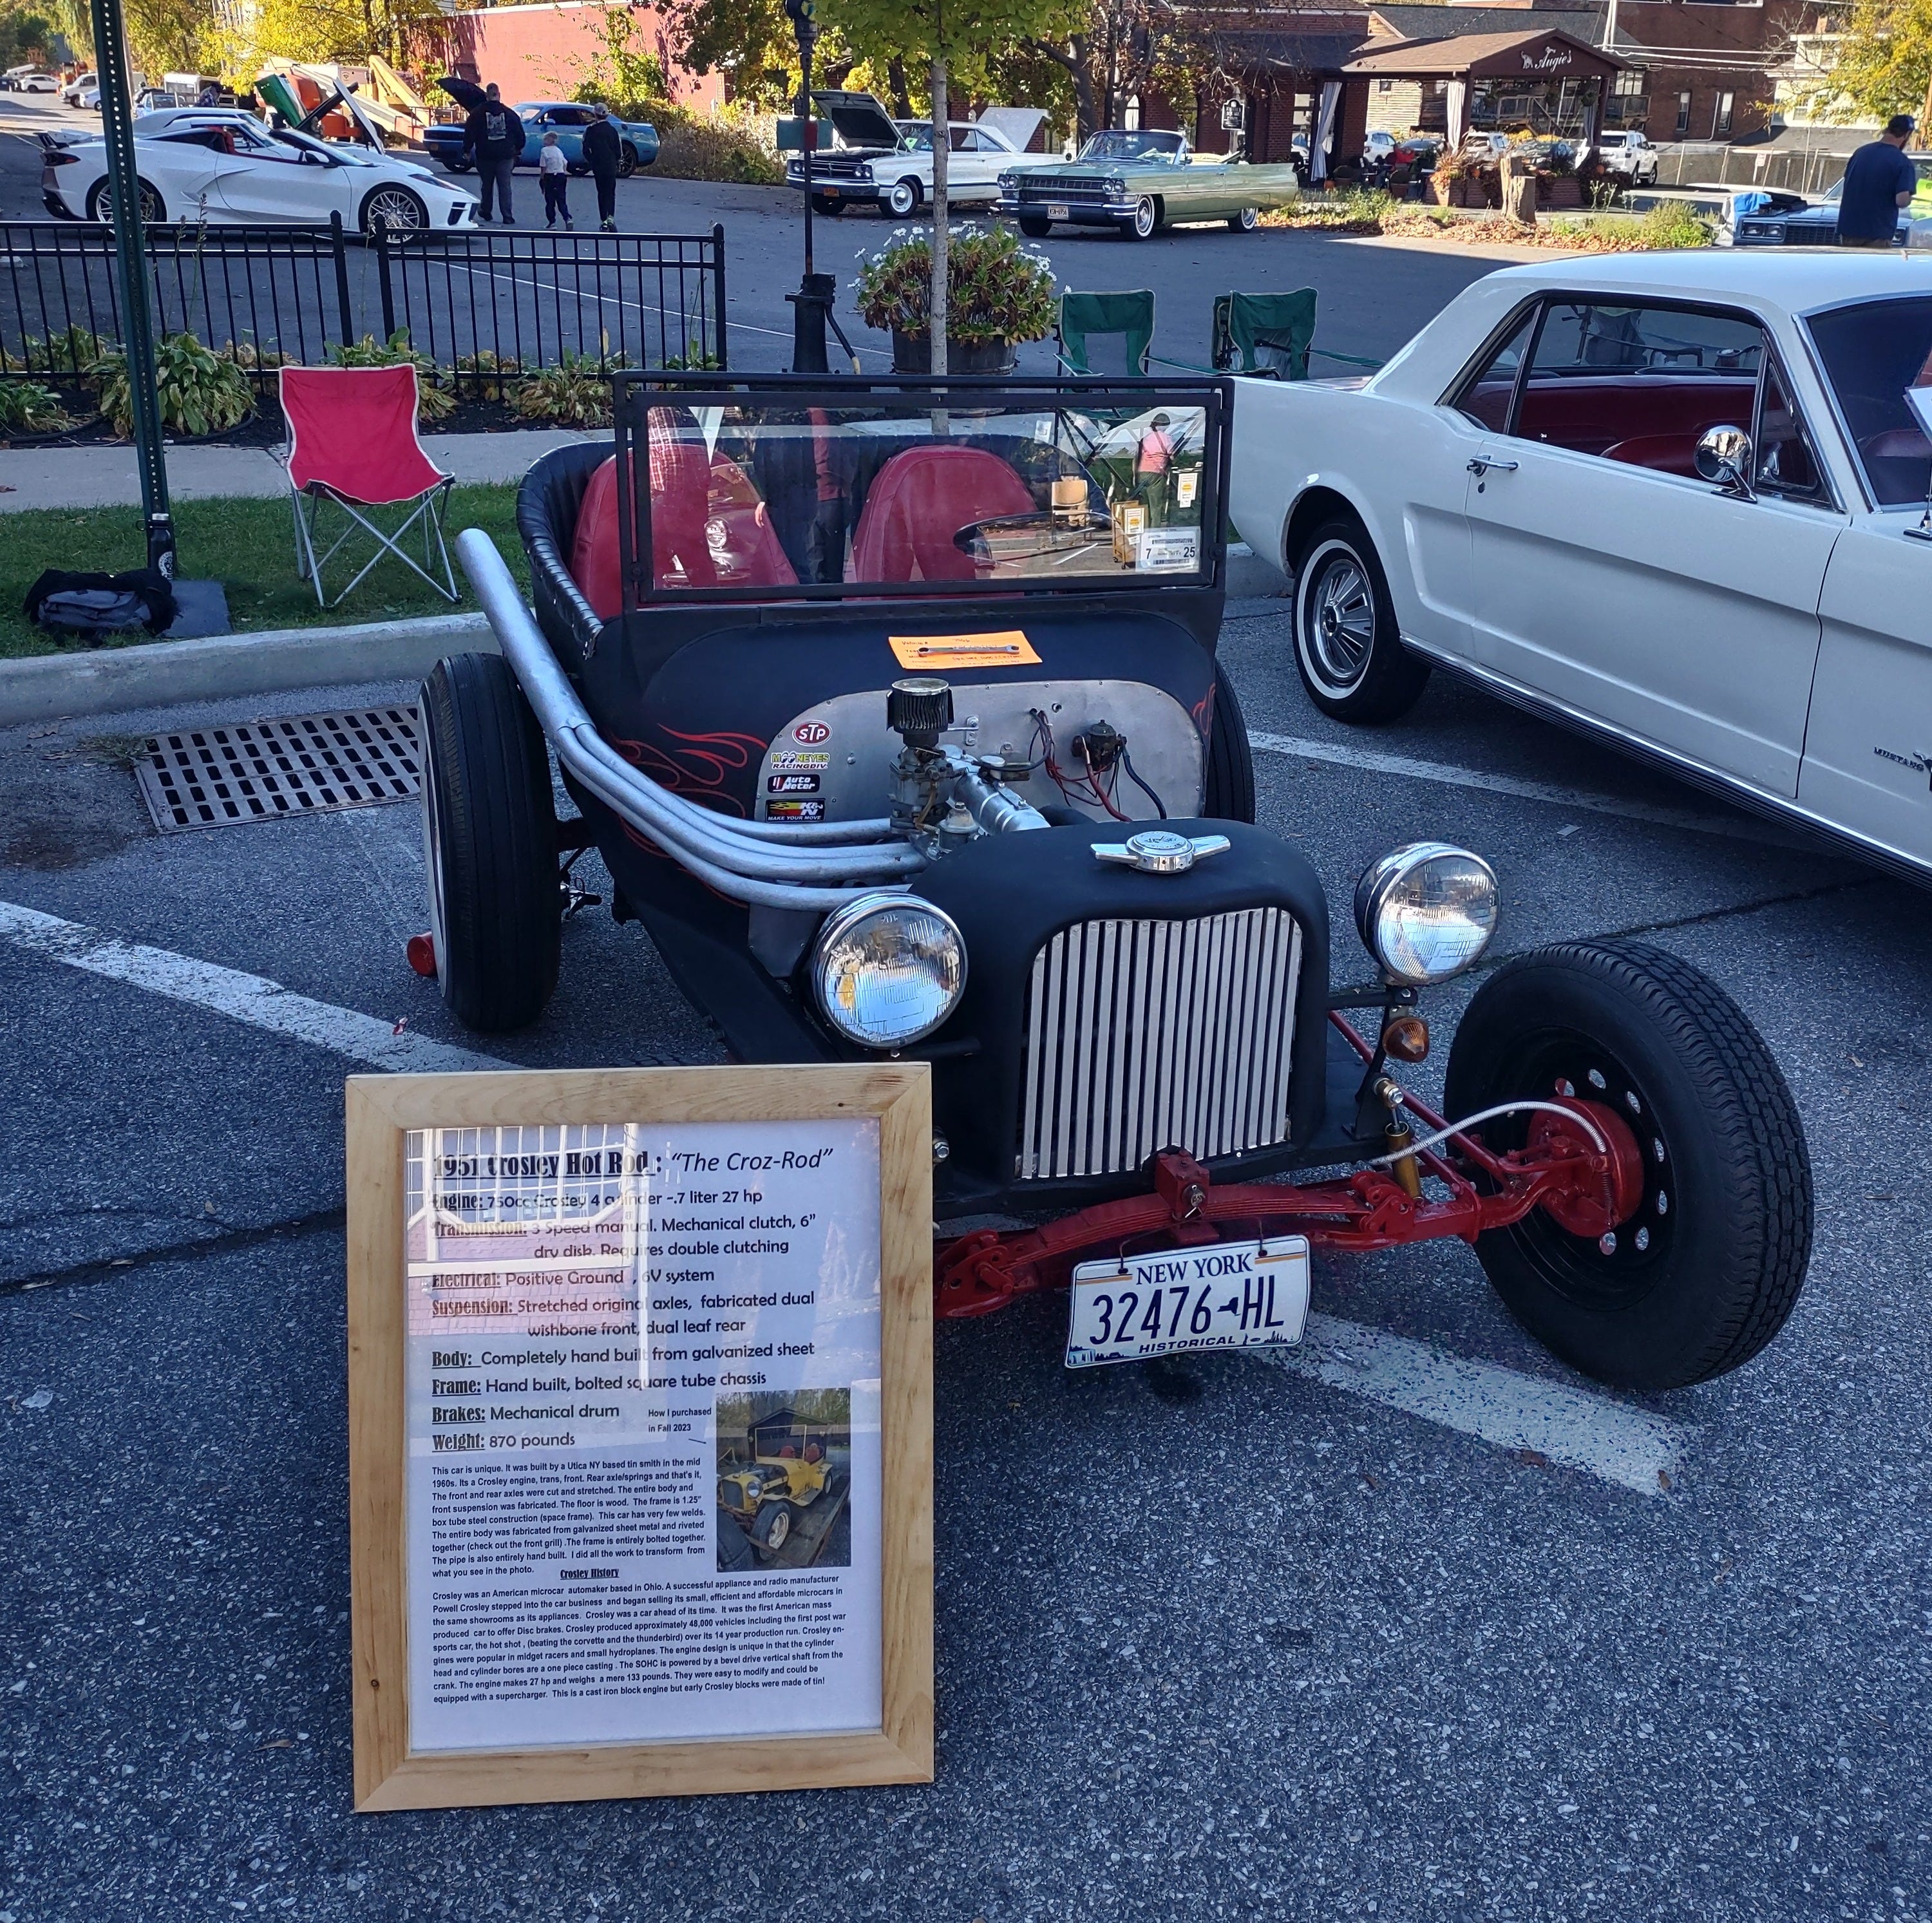
I brought my little matte black Crosley T-Bucket hot rod to both of the car shows that Fall and the car was a big hit. I made a large display with photos and details about the uniqueness of Crosleys - and how extra unique this car was. Driving it home from the last car show of the Fall was truly one of the happiest moments of my life. I had finally done it - I built my own hot rod!
With the car shows behind me, I decided to post some before and after pictures of the Crosley on a community Facebook page in the area where I believed it was built asking anyone who recognized it to reach out. In a few days I received a response from a guy named Tom who said he knew the original builder and his son! He confirmed the builder was indeed a tinsmith who had built the car with his son in their garage in Washington Mills, NY in the late 60’s. The car was originally blue and the son would drive it to high school every day. Tom said he saw the car all over town for a year or two, and then never saw it again until my Facebook post. The tinsmith had passed away and the son was apparently living in Florida, with no social media that Tom was aware of. Tom promised that the next time he heard of the son coming home to visit, he would pass on my phone number. I hope to connect with the son one day so that we can talk about the car, and I can share pictures of what I’ve done to give his father’s creation a second life.
I prepped the car for its winter nap and made room in the garage for the next incoming project, a 1958 King Midget…
Shaun,
I'm glad to see the progress since you brought it home. I am very happy to see it getting miles put on it too! It's amazing that I drove that car 55mph on the road once. and survived... I never did that again. Death Wobble doesn't begin to describe how it drove. It did smooth out at 50ish. It's looking good. I was not a fan of the ketchup & mustard colors Don chose for it. I also pushed it home once. The drive shaft broke. The torque tube hides the hideous repair. May you have many more miles of smiles :-) Leo
What a great story Shaun! I'm sure the tinsmith would be proud of your vision and exceptional work!